方案介绍 1、整体方案如何实现
本地部署nodejs+hexo,本地部署静态网站,再用git上传到github,生成xxx.github.io博客
注册域名,指向github博客,github免费提供了https证书及安全保障。
2、花销
如果你自己买主机(阿里云99一年)+域名(最便宜的20-90一年)+https证书(100元-2000元/年),当然云主机上还得防攻击,搞不好再被人挂马,又要恢复重建。是一笔花销也是。
如果用本方案,那么费用=域名年费(最便宜的20-90一年,com域名一年90RMB左右,cn或top之类的10年300不到),再无其它花钱,算算你一年就几十块钱就有自己的网站。
3、优点和缺点
优点就是便宜还安全。
缺点就是有的网络访问会比较慢、搜索引擎收录效果不好(google太强大了,不需要任保设置2天左右直接收录,必应次之,百度之类的。你懂的。。。)。
搭建HEXO并发布可以参考以下几个链接,内容很全,我这篇只是写了我的搭建过程:
1、官方主题链接,里面有详细的配置说明。
jerryc127/hexo-theme-butterfly: 🦋 A Hexo Theme: Butterfly
2、这位大佬的全集,写的非常详细,基本无坑。
基于 Hexo 从零开始搭建个人博客系列 | 唐志远
安装基础环境 安装npm 下接去官网下载匹配你系统环境的安装包,一直安装就行
https://nodejs.org/en/download/
安装hexo 安装hexo
安装完成后检查是否成功
安装git 登录官方网站,我用windows,选择对应版本,下载安装就行
Git - Install
初始化hexo并配置HEXO主题 初始化BLOG 使用超级管理员运行CMD
1
2
3
4
5
6
7
C:\Windows\System32>d: D:\>mkdir it-xusir.github.io D:\>cd it-xusir.github.io D:\it-xusir.github.io>hexo init INFO Cloning hexo-starter https://github.com/hexojs/hexo-starter.git INFO Install dependencies INFO Start blogging with Hexo!
安装butterfly主题 1 2 3 4 5 6 7 8 D:\it-xusir.github.io>git clone -b master https://github.com/jerryc127/hexo-theme-butterfly.git themes/butterfly Cloning into 'themes/butterfly'... remote: Enumerating objects: 8155, done. remote: Counting objects: 100% (732/732), done. remote: Compressing objects: 100% (417/417), done. remote: Total 8155 (delta 493), reused 315 (delta 315), pack-reused 7423 (from 2) Receiving objects: 100% (8155/8155), 3.52 MiB | 4.32 MiB/s, done. Resolving deltas: 100% (5136/5136), done.
安装渲染器
1 2 3 4 5 6 7 8 D:\it-xusir.github.io>npm install hexo-renderer-pug hexo-renderer-stylus --save added 35 packages, and audited 266 packages in 5s 38 packages are looking for funding run `npm fund` for details found 0 vulnerabilities
引用主题 修改目录D:\it-xusir.github.io下的_config.yml 配置
1 2 3 theme: landscape 改为 theme: butterfly
拷贝目录D:\it-xusir.github.io\themes\butterfly下的_config.yml到目录D:\it-xusir.github.io下并命名为 _config.butterfly.yml
以后 所有的配置修改几乎都在_config.butterfly.yml上进行
配置好之后,我们来目录下运行一下生成命令。查看是否成功。
1 2 3 4 5 6 7 8 9 10 11 12 13 14 15 16 17 18 19 20 21 22 23 24 25 26 27 28 29 30 31 32 33 34 35 36 37 38 39 40 41 42 43 44 45 46 47 48 49 50 51 52 53 54 55 56 57 58 D:\it-xusir.github.io>hexo cl && hexo g && hexo s INFO Validating config INFO =================================================================== ##### # # ##### ##### ###### ##### ###### # # # # # # # # # # # # # # # # ##### # # # # ##### # # ##### # # # # # # # # # ##### # # # # # # # # # # # # # # # ##### #### # # ###### # # # ###### # 5.5.1 =================================================================== INFO Deleted database. INFO Deleted public folder. INFO Validating config INFO =================================================================== ##### # # ##### ##### ###### ##### ###### # # # # # # # # # # # # # # # # ##### # # # # ##### # # ##### # # # # # # # # # ##### # # # # # # # # # # # # # # # ##### #### # # ###### # # # ###### # 5.5.1 =================================================================== INFO Start processing INFO Files loaded in 1.56 s INFO Generated: archives/index.html INFO Generated: index.html INFO Generated: archives/2025/10/index.html INFO Generated: img/favicon.ico INFO Generated: img/friend_404.gif INFO Generated: img/404.jpg INFO Generated: js/tw_cn.js INFO Generated: css/var.css INFO Generated: img/error-page.png INFO Generated: css/index.css INFO Generated: js/search/local-search.js INFO Generated: archives/2025/index.html INFO Generated: js/search/algolia.js INFO Generated: js/main.js INFO Generated: js/utils.js INFO Generated: 2025/10/21/hello-world/index.html INFO Generated: img/butterfly-icon.png INFO 17 files generated in 528 ms INFO Validating config INFO =================================================================== ##### # # ##### ##### ###### ##### ###### # # # # # # # # # # # # # # # # ##### # # # # ##### # # ##### # # # # # # # # # ##### # # # # # # # # # # # # # # # ##### #### # # ###### # # # ###### # 5.5.1 =================================================================== INFO Start processing INFO Hexo is running at http://localhost:4000/ . Press Ctrl+C to stop.
第一条hexo cl是清除缓存配置(建议每次修改后执行)
第二条hexo g是重新生成页面文件
第三条hexo s是表示起动服务
直接访问http://localhost:4000/http://localhost:4000/即可
配置发布到github 安装插件并修改配置 1 npm install hexo-deployer-git --save
配置_config.xml,修改如下内容
1 2 3 4 deploy: type: git repo: git@github.com:it-xusir/it-xusir.github.io.git branch: master
repo替换成你的github新建的repo
branch默认master就可以
配置github仓库 进入官网 https://github.com/
填写自己的邮箱、密码、用户名等信息,然后用邮箱验证即可完成。
创建仓库
点击右上角的+按钮,选择New repository,创建一个<用户名>.github.io的仓库
找不到创建入口的,访问:https://github.com/new
仓库的格式必须为:<用户名>.github.io
Description:为描述仓库(选填)
注意选择public仓库
勾选 Initialize this repository with a README 初始化一个 README.md 文件
点击 Creat repository 进行创建
配置git
执行命令
1 2 git config --global user.name "你的github用户名" git config --global user.email "你的邮箱"
通过git config -l 检查是否配置成功,至此git安装及配置全部完成。
1 2 3 4 5 6 7 8 9 10 11 12 13 14 15 16 17 D:\it-xusir.github.io>git config -l diff.astextplain.textconv=astextplain filter.lfs.clean=git-lfs clean -- %f filter.lfs.smudge=git-lfs smudge -- %f filter.lfs.process=git-lfs filter-process filter.lfs.required=true http.sslbackend=schannel core.autocrlf=true core.fscache=true core.symlinks=false pull.rebase=false credential.helper=manager credential.https://dev.azure.com.usehttppath=true init.defaultbranch=master user.name=it-xusir user.email=huiyangxu@hotmail.com core.autocrlf=false
生成ssh公钥
1 ssh-keygen -t rsa -C "你的邮箱"
之后打开C盘下用户文件夹下的.ssh的文件夹,会看到 id_rsa.pub
用记事本打开上述图片中的公钥(id_rsa.pub),复制里面的内容,然后开始在github中配置ssh密钥。
进入github,点击右上角头像 选择settings
进入设置页后选择 SSH and GPG keys
title自己起个名,然后把密钥复制粘贴到key的框内,最后add sshkey
测试
1 2 D:\it-xusir.github.io>ssh -T git@github.com Hi it-xusir! You've successfully authenticated, but GitHub does not provide shell access.
上传代码 还有一步配置别忘记了,把_config.xml里的url改成的你域名,如果你还没申请域名,就用github的博客地址。
1 url: https://itxusir.com/
然后
1 2 3 hexo clean hexo generate hexo deploy
每次你在本地修改完,再重复执行上面的命令,同步到github
配置域名解析 购买域名后,实名认证进入阿里云控制台,点云解析进去,找到你刚买的域名,
点进去添加两条解析记录:
1、cname记录添加,主机www,记录值就是你的github博客地址(我这里是it-xusir.github.io)
2、添加A记录, 主机记录@,记录值填github的IP地址(185.199.111.153、185.199.110.153、185.199.109.153、185.199.108.153)
打开博客/source目录,我的是D:\it-xusir.github.io\source,新建CNAME文件,注意没有后缀。然后在里面写上你的域名(例如:itxusir.com),保存。最后运行hexo g、hexo d上传到github。这样到最后当你在地址栏输入xxx.github.io时,才会自动跳转到你的域名。
打开你的github博客项目,点击settings,点击Pages,拉到下面Custom domain处,填上你自己的域名 ,保存。
最后勾选enforcehttps记录。让你的网站变成HTTPS
配置页面 配置导航栏 修改网站根目录下_config.butterfly.yml文件里关于menu的内容如下(这里对应的目录页面都没有创建,后在后续创建页面)
1 2 3 4 5 6 7 8 9 10 11 menu: 主页: /|| fas fa-home 时间轴: /archives/ || fas fa-archive 文章汇总||fas fa-folder-open: 技术标签: /tags/|| fas fa-newspaper 技术分类: /categories/|| fas fa-newspaper 休闲一会||fas fa-list: 休闲视频: /break/|| fas fa-heart 60S新闻: /news/|| fas fa-newspaper 友链: /link/|| fas fa-link 关于我: /about/|| fas fa-heart
例如
“休闲一会”就包含两个子菜单
其它页面都是单个页面
/代表主页,/archives表下相应目录下的主页,fas fa-archive代表图标,各个内容之间通过||分格
新建时间轴页面 在D:\it-xusir.github.io目录下执行命令,创建archives页面
1 D:\it-xusir.github.io>hexo new page archives
配置D:\it-xusir.github.io\source\archives目录下的index.md,只个改里面的内容就好,不要把灰色的显示框弄没。
1 2 3 title: 时间轴 date: 2025-10-09 11:37:01 type: 'archives'
配置完后,执行命令
再登录界面,时间轴页面就能打开了
新建分类、标签、新页面 执行命令,创建分类页面categories和标签页面tags
1 2 3 4 5 6 7 8 9 10 11 12 13 14 15 16 17 18 19 20 21 22 23 24 25 26 27 D:\it-xusir.github.io>hexo new page categories INFO Validating config INFO =================================================================== ##### # # ##### ##### ###### ##### ###### # # # # # # # # # # # # # # # # ##### # # # # ##### # # ##### # # # # # # # # # ##### # # # # # # # # # # # # # # # ##### #### # # ###### # # # ###### # 5.5.1 =================================================================== INFO Created: D:\it-xusir.github.io\source\categories\index.md D:\it-xusir.github.io>hexo new page tags INFO Validating config INFO =================================================================== ##### # # ##### ##### ###### ##### ###### # # # # # # # # # # # # # # # # ##### # # # # ##### # # ##### # # # # # # # # # ##### # # # # # # # # # # # # # # # ##### #### # # ###### # # # ###### # 5.5.1 =================================================================== INFO Created: D:\it-xusir.github.io\source\tags\index.md
配置 分类页面categories,进入到D:\it-xusir.github.io\source\categories目录下,配置index.md,只个改里面的内容就好,不要把灰色的显示框弄没。
1 2 3 4 title: 文章分类 date: 2025-10-11 21:57:37 type: "categories" layout: "categories"
配置 分类页面tags,进入到D:\it-xusir.github.io\source\tags目录下,配置index.md,只个改里面的内容就好,不要把灰色的显示框弄没。
1 2 3 4 title: 标签 date: 2025-10-11 21:57:47 type: "tags" layout: "tags"
配置完后,执行命令
再登录界面,对应的分类、标签页面就能打开了
新建友情链接页面 就是字面意思,友情链接,或者是你收藏 的网站链接展示出来。
前往博客目录D:\it-xusir.github.io\soure目录下,新建_data目录
然后在_data目录下创建link.yml,输入链接内容(以我的为示例)
注意yml格式缩进和空格,差一点就不生效。。。
1 2 3 4 5 6 7 8 9 10 11 12 13 14 15 16 17 18 19 20 21 22 23 24 25 26 27 class: class_name: 我的其它BLOG link_list: 1: name: 我在CSDN link: https://blog.csdn.net/xxddxhyz?spm=1011.2266.3001.5343 avatar: https://www.itxusir.com/img/touxiang.jpg descr: 我的CSDN博客 2: name: 我在墨天轮 link: https://www.modb.pro/u/3605 avatar: https://www.itxusir.com/img/touxiang.jpg descr: 我的墨天轮博客 class2: class_name: 技术大佬博客 link_list: 1: name: 少安事务所 link: https://shawnyan.cn/ avatar: https://shawnyan.cn/img/favicon.ico descr: 数据库精品博主 2: name: 暮渔木鱼的技术小栈 link: https://blog.krielwus.top/ avatar: https://blog.krielwus.top/upload/head_20250107234048.png descr: 鱼总的技术小栈
新建about页面 自我介绍页面about,进入到网站根目录配置D:\it-xusir.github.io执行命令
1 D:\it-xusir.github.io>hexo new page about
进入到D:\it-xusir.github.io\source\about目录下,配置index.md,只个改里面的内容就好,不要把灰色的显示框弄没。
1 2 3 title: 关于我的介绍 date: 2025-10-09 11:36:14 type: 'abort'
灰色框外就是你的markdown文档介绍了,内容自己写就行。
新建其它页面 比如我这里的这两个页面
1 2 3 休闲一会||fas fa-list: 休闲视频: /break/|| fas fa-heart 60S新闻: /news/|| fas fa-newspaper
其实操作一样,就是执行
然后去对应目录修改index.md内容就行
下面是刷视频break页面的代码
1 2 3 4 5 6 7 8 9 10 11 12 13 14 15 16 17 18 19 20 21 22 23 24 25 26 27 28 29 30 31 32 33 34 35 36 37 38 39 40 41 42 43 44 45 46 47 48 49 50 51 52 53 54 55 56 57 58 59 60 61 62 63 64 65 --- title: 休息一会,放松一下 date: 2025-10-15 17:09:03 type: 'break' --- <div style="margin: 20px 0; text-align: center; display: flex; justify-content: center; gap: 10px;"> <!-- 暂停/开始按钮 --> <button onclick=" const video = document.getElementById('tzy-video'); if (video.paused) { video.play(); this.textContent = '暂停'; } else { video.pause(); this.textContent = '开始'; } " style=" padding: 12px 24px; font-size: 16px; font-weight: bold; background-color: #10b981; /* 绿色 */ color: white; border: none; border-radius: 6px; cursor: pointer; box-shadow: 0 2px 4px rgba(0,0,0,0.1); transition: all 0.3s ease; " onmouseover="this.style.backgroundColor='#059669'" onmouseout="this.style.backgroundColor='#10b981'" > 暂停 </button> <button onclick="location.reload();" style=" padding: 12px 24px; font-size: 16px; font-weight: bold; background-color: #2563eb; /* 蓝色 */ color: white; border: none; border-radius: 6px; cursor: pointer; box-shadow: 0 2px 4px rgba(0,0,0,0.1); transition: all 0.3s ease; " onmouseover="this.style.backgroundColor='#1d4ed8'" onmouseout="this.style.backgroundColor='#2563eb'" > 下一个 </button> </div> <video id="tzy-video" style="width: 100%; max-width: 540px; height: auto; display: block; margin: 0 auto;" preload="metadata" autoplay controls <-- muted-->> <source src="http://api.mmp.cc/api/ksvideo?type=mp4&id=GaoZhiLiangXiaoJieJie" type="video/mp4"> 视频加载失败,请检查链接有效性 </video>
下面是60S新闻的代码
1 2 3 4 5 6 7 8 9 10 11 12 --- title: 每日早报60s id: a1 tags: 每日早报60s top: true cover: true categories: 每日早报60s toc: true sidebar: true --- 
文章发布 配置markdownd代码格式 去修改配置文件_config.butterfly.yml中内容
1 2 3 4 5 6 7 8 code_blocks: # Code block theme: darker / pale night / light / ocean / false theme: darker macStyle: true # Code block height limit (unit: px) height_limit: false word_wrap: false
黑色背景,MAC风格
发布文章 直接在D:\it-xusir.github.io\source\ _posts路径下新建markdown文件就行
开头格式要求示例:
1 2 3 4 5 6 7 8 9 10 --- title: AIX平台下Oracle 11g RAC修改PUBLIC/VIP/SCAN tags: - aix - oracle - database - rac categories: oracle_rac_安装调试 date: 2025-10-13 17:30:00 ---
tags 代表技术标签
categoriesw代表文章分类
后面就正常写内容就行了,
最后执行页面生成命令
图床问题 markdown支持html语法,那么就是说可以用csdn或者其它blog空间的图床了,哈哈
直接插入别的BLOG里的图片就行,替换src=”图片地址”
1 <img alt="1.png" src="https://i-blog.csdnimg.cn/blog_migrate/da2804f19df5d557488f51d4aa6ba583.png" referrerpolicy="no-referrer"/>
配置文章字数统计 安装插件
1 npm i --save hexo-wordcount
去修改配置文件_config.butterfly.yml中内容
1 2 3 4 5 6 7 8 wordcount: enable: true # Display the word count of the article in post meta post_wordcount: true # Display the time to read the article in post meta min2read: true # Display the total word count of the website in aside's webinfo total_wordcount: true
文章图片默认 去修改配置文件_config.butterfly.yml中内容
1 2 3 4 5 6 7 8 9 10 11 12 13 14 15 cover: # Disable the cover or not index_enable: true aside_enable: true archives_enable: true # When cover is not set, the default cover is displayed default_cover: - /img/top2.jpg - /img/top3.jpg - /img/top4.jpg - /img/top5.jpg - /img/top6.jpg - /img/top1.jpg - /img/top7.jpg - /img/top8.jpg
文章生成唯一链接 安装插件
1 npm install hexo-abbrlink --save
修改站点配置文件_config.yml中permalink属性。
1 2 3 4 5 6 - permalink: :year/:month/:day/:title/ #修改为 permalink: post/:abbrlink.html # post为自定义前缀 abbrlink: alg: crc32 #算法: crc16(default) and crc32 rep: hex #进制: dec(default) and hex
其它美化及优化配置 配置网站介绍 去D:\it-xusir.github.io目录下修改_config.yml
1 2 3 4 5 6 7 8 # Site title: 徐sir的it小栈 subtitle: '一起来学习' description: '关注我的blog和我一起学it技术' keywords: database,oracle,postgresql,mysql,system,linux,virtualization,storage author: 徐sir language: zh-CN timezone: ''
配置 网站图标 去修改配置文件_config.butterfly.yml中内容
ico图标可以自己或让AI设计一个,去网站上缩小,然后传到\themes\butterfly\source目录下
在线制作ico图标 | 在线ico图标转换工具 方便制作favicon.ico - 比特虫 - Bitbug.net
配置top图大小 去修改配置文件_config.butterfly.yml中内容
1 index_top_img_height: 330px
大小自己看多大合适,我是觉得一打开网站先贴一脸图片很怪异,给改小了
配置头像 自己做个压缩格式的JPG图,然后传到\themes\butterfly\source\img目录下
去修改配置文件_config.butterfly.yml中内容
1 2 3 avatar: img: /img/touxiang.jpg effect: false
配置背景图 自己做个压缩格式的JPG图,然后传到\themes\butterfly\source\img目录下
去修改配置文件_config.butterfly.yml中内容
1 background: /img/background.jpg
配置社交图标 去修改配置文件_config.butterfly.yml中内容
1 2 3 social: fab fa-github: https://github.com/it-xusir/ || Github || '#24292e' fas fa-envelope: mailto:huiyangxu@hotmail.com || Email || '#4a7dbe'
配置微信联系我按钮 在头像下配置联系我按钮,点击显示微信二维码
1 2 3 4 5 6 7 8 card_author: enable: true description: button: enable: enable icon: fab fa-weixin text: 微信联系我 link: /img/weixin.jpg
配置页面透明 去修改配置文件_config.butterfly.yml中内容,修改以下几个选项为如下值
1 2 3 4 5 6 7 8 index_img: transparent # Add a mask to the header and footer mask: header: false footer: false footer_img: transparent
在D:\it-xusir.github.io\themes\butterfly\source\css下新建文件transparent.styl,内容如下
1 2 3 4 5 6 7 8 9 10 11 12 13 14 15 16 17 18 19 20 21 22 23 24 25 26 27 28 29 30 31 32 33 34 35 36 37 38 39 40 41 42 43 44 45 46 47 48 49 50 @import 'nib' // 顶部图 #page-header &, &:before background: transparent !important &.post-bg, &.not-home-page height: 280px !important #post-info bottom: 40px !important #page-site-info top: 140px !important @media screen and (max-width: 768px) &.not-home-page height: 200px !important #post-info bottom: 10px !important #page-site-info top: 100px !important .top-img height: 250px margin: -50px -40px 50px border-top-left-radius: inherit border-top-right-radius: inherit background-position: center center background-size: cover transition: all 0.3s @media screen and (max-width: 768px) height: 230px margin: -36px -14px 36px [data-theme='dark'] & filter: brightness(0.8) // 页脚 #footer:before background-color: alpha(#FFF, .5) [data-theme='dark'] & background-color: alpha(#000, .5) #footer-wrap, #footer-wrap a color: #111 transition: unset [data-theme='dark'] & color: var(--light-grey)
增加css
1 2 3 inject: head: - <link rel="stylesheet" href="/css/transparent.css">
重启服务查看
配置头像禁止转动 当鼠标移到侧边栏头像上时,头像会播放旋转动效,要想禁用可以找到
1 2 3 4 5 6 7 8 9 10 11 12 13 14 15 .avatar-img overflow: hidden margin: 0 auto width: 110px height: 110px border-radius: 70px img width: 100% height: 100% transition: filter 375ms ease-in .2s, transform .3s object-fit: cover &:hover transform: unset
配置下雪特效 在目录D:\it-xusir.github.io\themes\butterfly\source\js下创建js脚本snowflake.js,内容如下
1 2 3 4 5 6 7 8 9 10 11 12 13 14 15 16 17 18 19 20 21 22 23 24 25 26 27 28 29 30 31 32 33 34 35 36 37 38 39 40 41 42 43 44 45 46 47 48 49 50 51 52 53 54 55 56 57 58 59 60 61 62 63 64 65 66 67 68 69 70 71 72 73 74 75 76 77 78 79 80 81 82 83 84 85 86 87 88 89 90 91 92 93 94 95 96 97 98 99 100 101 102 103 104 105 106 if((navigator.userAgent.match(/(phone|pad|pod|iPhone|iPod|ios|iPad|Android|Mobile|BlackBerry|IEMobile|MQQBrowser|JUC|Fennec|wOSBrowser|BrowserNG|WebOS|Symbian|Windows Phone)/i))) { // 移动端不显示 } else{ document.write('<canvas id="snow" style="position:fixed;top:0;left:0;width:100%;height:100%;z-index:100;pointer-events:none"></canvas>'); window && (()=>{ let e = { flakeCount: 50, minDist: 150, color: "255, 255, 255", size: 2, speed: .5, opacity: .2, stepsize: .5 }; const t = window.requestAnimationFrame || window.mozRequestAnimationFrame || window.webkitRequestAnimationFrame || window.msRequestAnimationFrame || function(e) { window.setTimeout(e, 1e3 / 60) } ; window.requestAnimationFrame = t; const i = document.getElementById("snow"), n = i.getContext("2d"), o = e.flakeCount; let a = -100, d = -100, s = []; i.width = window.innerWidth, i.height = window.innerHeight; const h = ()=>{ n.clearRect(0, 0, i.width, i.height); const r = e.minDist; for (let t = 0; t < o; t++) { let o = s[t]; const h = a, w = d, m = o.x, c = o.y, p = Math.sqrt((h - m) * (h - m) + (w - c) * (w - c)); if (p < r) { const e = (h - m) / p, t = (w - c) / p, i = r / (p * p) / 2; o.velX -= i * e, o.velY -= i * t } else o.velX *= .98, o.velY < o.speed && o.speed - o.velY > .01 && (o.velY += .01 * (o.speed - o.velY)), o.velX += Math.cos(o.step += .05) * o.stepSize; n.fillStyle = "rgba(" + e.color + ", " + o.opacity + ")", o.y += o.velY, o.x += o.velX, (o.y >= i.height || o.y <= 0) && l(o), (o.x >= i.width || o.x <= 0) && l(o), n.beginPath(), n.arc(o.x, o.y, o.size, 0, 2 * Math.PI), n.fill() } t(h) } , l = e=>{ e.x = Math.floor(Math.random() * i.width), e.y = 0, e.size = 3 * Math.random() + 2, e.speed = 1 * Math.random() + .5, e.velY = e.speed, e.velX = 0, e.opacity = .5 * Math.random() + .3 } ; document.addEventListener("mousemove", (e=>{ a = e.clientX, d = e.clientY } )), window.addEventListener("resize", (()=>{ i.width = window.innerWidth, i.height = window.innerHeight } )), (()=>{ for (let t = 0; t < o; t++) { const t = Math.floor(Math.random() * i.width) , n = Math.floor(Math.random() * i.height) , o = 3 * Math.random() + e.size , a = 1 * Math.random() + e.speed , d = .5 * Math.random() + e.opacity; s.push({ speed: a, velX: 0, velY: a, x: t, y: n, size: o, stepSize: Math.random() / 30 * e.stepsize, step: 0, angle: 180, opacity: d }) } h() } )() } )(); }
配置_config.butterfly.yml文件inject下bottom引入snowflake.js
1 2 3 4 5 inject: head: - <link rel="stylesheet" href="/css/middle.css"> bottom: - <script src="/js/snowflake.js"></script>
配置导航栏居中放大字体 D:\it-xusir.github.io\themes\butterfly\source\css下新建middle.css文件,内容如下
1 2 3 4 5 6 7 8 9 10 11 12 13 14 15 16 17 18 19 #nav .menus_items { position: absolute; width: fit-content; left: 50%; transform: translateX(-50%); } /*顶栏美化*/ #nav .site-page { font-size: 1.1em; /*字体大小*/ letter-spacing: 2px; /*字体间距*/ font-weight: 600; /*字体粗细*/ } #nav { height: 100px; /*顶栏高度调整*/ } #page-header.nav-fixed #nav { top: -70px; /*顶栏调整空缺补齐*/ }
配置_config.butterfly.yml文件inject下head引入middle.css
1 2 3 4 5 6 inject: head: - <link rel="stylesheet" href="/css/transparent.css"> - <link rel="stylesheet" href="/css/middle.css"> bottom: - <script src="/js/snowflake.js"></script>
侧边公告栏添加图片 修改主题配置_config.butterfly.yml里
这里的img目录对应D:\it-xusir.github.io\themes\butterfly\source\img ,把要加载的图片放到img目录里就行。
1 2 3 card_announcement: enable: true content: 欢迎关注我的微信公众号 <img src="/img/wechat.jpg" alt="公告图片描述" style="max-width:100%;height:auto;">
关闭站点统计 我这个放在github上导致加载极慢,搜索功能受到影响,决定去掉。
修改主题配置_config.butterfly.yml里
1 2 3 4 busuanzi: site_uv: false site_pv: false page_pv: false
文章顶部添加海浪特效 修改 themes/butterfly/layout/includes/header/index.pug 大概第 33 行include ./post-info.pug和第34行else if globalPageType === ‘home’之中添加如下内容(代码块第2-10行是添加的内容)
1 2 3 4 5 6 7 8 9 10 11 include ./post-info.pug section.main-hero-waves-area.waves-area svg.waves-svg(xmlns='http://www.w3.org/2000/svg', xlink='http://www.w3.org/1999/xlink', viewBox='0 24 150 28', preserveAspectRatio='none', shape-rendering='auto') defs path#gentle-wave(d='M -160 44 c 30 0 58 -18 88 -18 s 58 18 88 18 s 58 -18 88 -18 s 58 18 88 18 v 44 h -352 Z') g.parallax use(href='#gentle-wave', x='48', y='0') use(href='#gentle-wave', x='48', y='3') use(href='#gentle-wave', x='48', y='5') use(href='#gentle-wave', x='48', y='7') else if globalPageType === 'home'
然后新建样式D:\it-xusir.github.io\themes\butterfly\source\css\waves.styl,文件内容如下
1 2 3 4 5 6 7 8 9 10 11 12 13 14 15 16 17 18 19 20 21 22 23 24 25 26 27 28 29 30 31 32 33 34 35 36 37 38 39 40 41 42 43 44 45 46 47 48 49 50 51 52 53 54 55 56 57 58 59 60 61 62 63 64 65 66 67 68 69 70 71 72 73 74 75 /* 波浪css */ .main-hero-waves-area { width: 100%; position: absolute; left: 0; bottom: -40px; z-index: 5; } .waves-area .waves-svg { width: 100%; height: 4rem; } /* Animation */ .parallax > use { animation: move-forever 25s cubic-bezier(0.55, 0.5, 0.45, 0.5) infinite; } .parallax > use:nth-child(1) { animation-delay: -2s; animation-duration: 7s; fill: #f7f9febd; } .parallax > use:nth-child(2) { animation-delay: -3s; animation-duration: 10s; fill: #f7f9fe82; } .parallax > use:nth-child(3) { animation-delay: -4s; animation-duration: 13s; fill: #f7f9fe36; } .parallax > use:nth-child(4) { animation-delay: -5s; animation-duration: 20s; fill: #f7f9fe; } /* 黑色模式背景 */ [data-theme="dark"] .parallax > use:nth-child(1) { animation-delay: -2s; animation-duration: 7s; fill: #18171dc8; } [data-theme="dark"] .parallax > use:nth-child(2) { animation-delay: -3s; animation-duration: 10s; fill: #18171d80; } [data-theme="dark"] .parallax > use:nth-child(3) { animation-delay: -4s; animation-duration: 13s; fill: #18171d3e; } [data-theme="dark"] .parallax > use:nth-child(4) { animation-delay: -5s; animation-duration: 20s; fill: #18171d; } @keyframes move-forever { 0% { transform: translate3d(-90px, 0, 0); } 100% { transform: translate3d(85px, 0, 0); } } /*Shrinking for mobile*/ @media (max-width: 768px) { .waves-area .waves-svg { height: 40px; min-height: 40px; } }
修改主题配置_config.butterfly.yml,在inject里引入 waves.css(文件名是styl,引入的时候写css)
1 - <link rel="stylesheet" href="/css/waves.css">
添加后如下所示
1 2 3 4 5 6 7 inject: head: - <link rel="stylesheet" href="/css/middle.css"> - <link rel="stylesheet" href="/css/transparent.css"> - <link rel="stylesheet" href="/css/waves.css"> bottom: - <script src="/js/snowflake.js"></script>
可以用于别人订阅,也可用户于更新网站地图给搜索引擎。
cmd到网站根目录下D:\it-xusir.github.io
1 npm install hexo-generator-feed
编辑网站根目录下_config.xml,增加如下内容
1 2 3 4 5 6 7 8 9 10 11 12 feed: type: atom path: atom.xml limit: 20 hub: content: content_limit: 140 content_limit_delim: ' ' order_by: -date icon: icon.png autodiscovery: true template:
修改主题配置_config.butterfly.yml里,增加RSS按钮
1 2 3 4 social: fab fa-github: https://github.com/it-xusir/ || Github || '#24292e' fas fa-envelope: mailto:huiyangxu@hotmail.com || Email || '#4a7dbe' fa fa-rss: /atom.xml || RSS || '#4a7dbe'
配置留言模块 Github配置
你的仓库是公开的(public),否则访客将无法查看 discussion。
giscus app 已安装 ,否则访客将无法评论和回应。已在你的仓库中启用Discussions 功能 。
公开Github仓库 参考hexo-next & giscus 评论测试 | 初来乍到,一无所知
参考GIthub文档:设置仓库可见性 - GitHub Docs
打开博客所在Github仓库(Repositories)https://github.com/用户名/用户名.github.io)
在设置界面(Settings)的General下页面
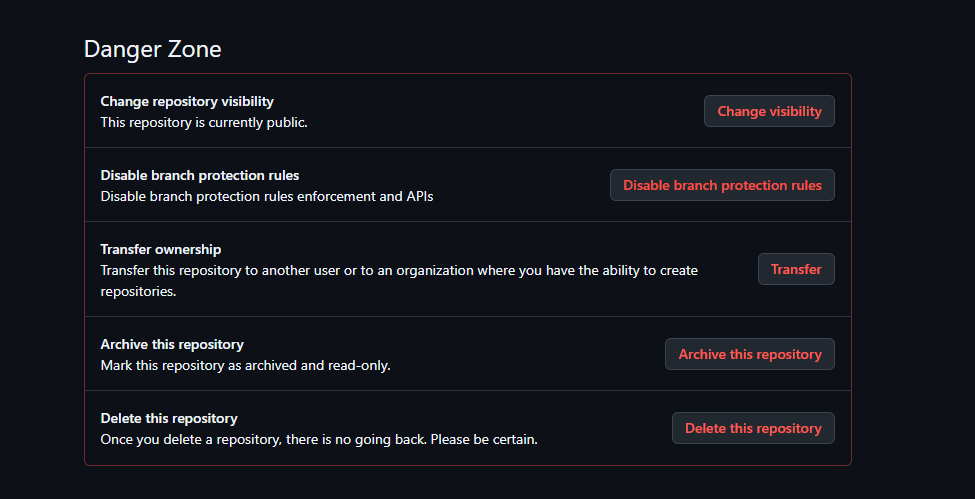
拉到最下面的Danger Zone部分(红色框)
将Change repository visibility设置为public(公开)
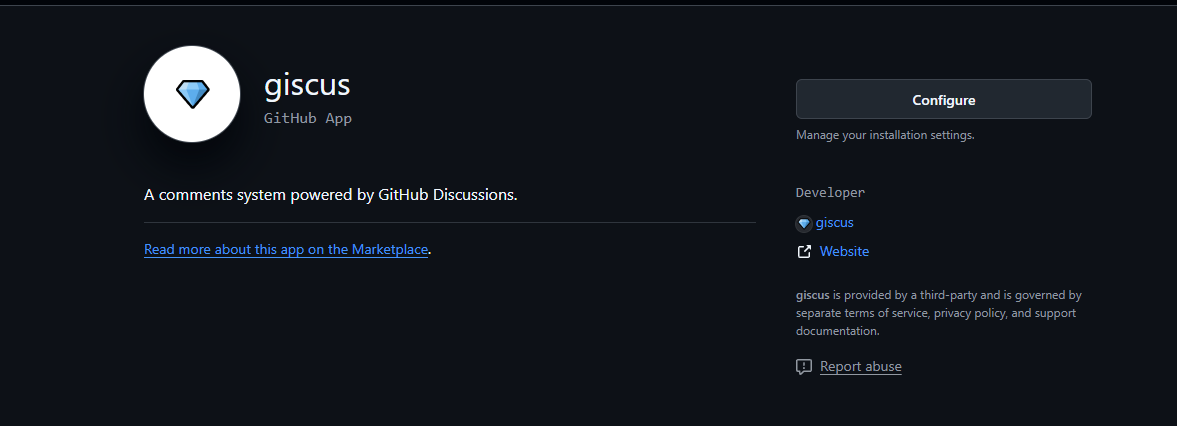
安装giscus app 点击链接安装:GitHub Apps - giscus
启用Discussions 功能 参考:Enabling or disabling GitHub Discussions for a repository - GitHub Docs
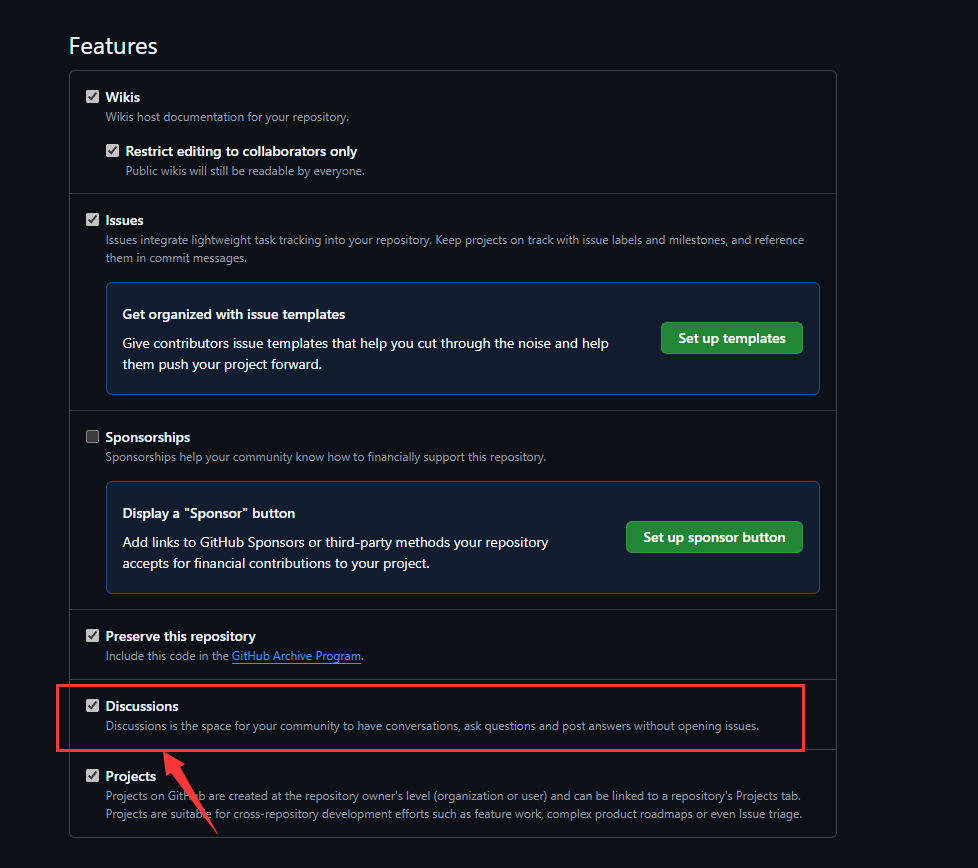
导航到Github仓库主页,点击Settings(设置)
找到Features部分,选择Discussions
Giscus配置
访问Giscus的官方网站
配置Giscus相关设置,配置完后在启用giscus处自动生成配置代码
1 2 3 4 5 6 7 8 9 10 11 12 13 14 15 <script src="https://giscus.app/client.js" data-repo="[在此输入仓库]" data-repo-id="[在此输入仓库 ID]" data-category="[在此输入分类名]" data-category-id="[在此输入分类 ID]" data-mapping="pathname" data-strict="0" data-reactions-enabled="1" data-emit-metadata="0" data-input-position="bottom" data-theme="preferred_color_scheme" data-lang="zh-CN" crossorigin="anonymous" async> </script>
HEXO配置
安装hexo-next-giscus插件
在hexo博客根目录打开命令行,执行以下命令,安装插件
1 npm install hexo-next-giscus --save
编辑Next主题配置文件
在hexo根目录下,打开主题配置文件.\themes\next\_config.yml
添加以下代码:
1 2 3 4 5 6 7 8 9 10 11 12 13 giscus: enable: true repo: 在此输入仓库名 repo_id: 在此输入仓库 ID category: 在此输入分类名 category_id: 在此输入分类 ID mapping: title reactions_enabled: 1 emit_metadata: 0 input_position: bottom lang: zh-CN loading: lazy crossorigin: anonymous
按照Giscus生成的配置文件,填入对应的参数,注意去掉引号""和data-
注意直接在配置文件末尾加入上述代码,而不是在comments:后面添加
配置搜索模块 安装local_search搜索插件 cmd在网站根目录下执行
1 npm install hexo-generator-search --save
修改站点配置文件_config.yml,添加如下代码:
1 2 3 4 5 search: path: search.xml field: post format: html limit: 10000
修改主题配置_config.butterfly.yml里
1 2 3 4 5 6 7 8 9 10 11 12 13 14 15 16 17 18 19 20 21 22 23 24 25 26 27 search: # Choose: algolia_search / local_search / docsearch # leave it empty if you don't need search enable: true use: local_search placeholder: 搜索一下你想要的关键字 # Algolia Search algolia_search: # Number of search results per page hitsPerPage: 6 # Local Search local_search: enable: true # Preload the search data when the page loads. preload: false # Show top n results per article, show all results by setting to -1 top_n_per_article: 1 # Unescape html strings to the readable one. unescape: false # Enable pagination for search results #pagination: # enable: false # Number of search results per page # hitsPerPage: 8 CDN:


